Step 3: Setting up a Workspace
In this section you will learn how to set up a workspace. This article will show you how to:
II) Set up user privileges & features
V) Set up folder access levels
TIP: Numbers II to VI of this article will be covered in more detail over the next seven articles in this user guide.
.
I) Create a new Workspace
a) Click Create a new workspace at the top of your Dashboard

b) Select the account where you would like to create the Workspace.
c) Click Next.
d) Give the Workspace a title and add a description if desired.
e) Click Create Workspace.
f) You will be directed to your new Workspace. Follow the steps below to configure it.
TIP: It is possible that your internal Huddle Administrator has restricted the ability to create Workspaces. If this is the case, your request to create a new Workspace will be sent to the Huddle Administrator who will set up the Workspace for you then invite you into it so you can finish the configuration as below.
.
II) Set up user privileges & features
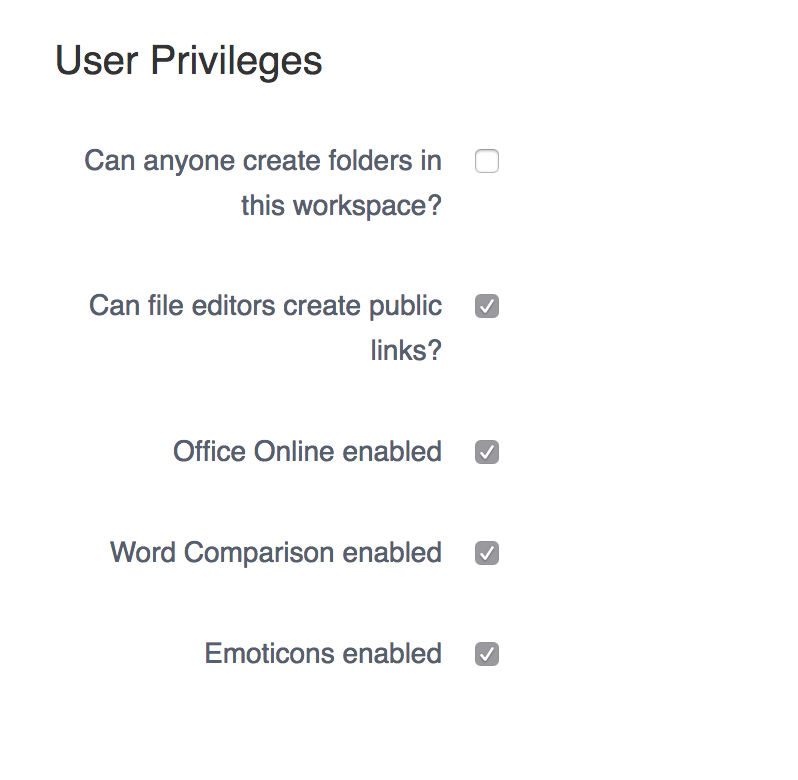
a) Set up user privileges
1) Go to the Settings tab of your new Workspace to start the configuration.

2) Scroll to the bottom of the page and click Edit Workspace Settings.
3) Go to the user privileges section.
4) Decide whether or not users in your Workspace will be allowed to create folders or use public links, offline files and document comparison.
5) Check the boxes of the features you would like to remain available.

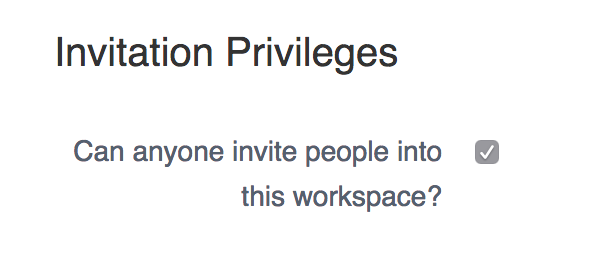
6) Go to the invitation privileges section.
7) Decide whether or not all users will be able to invite others into the Workspace.
8) Check the box if you would like all users to be able to invite members into the Workspace.

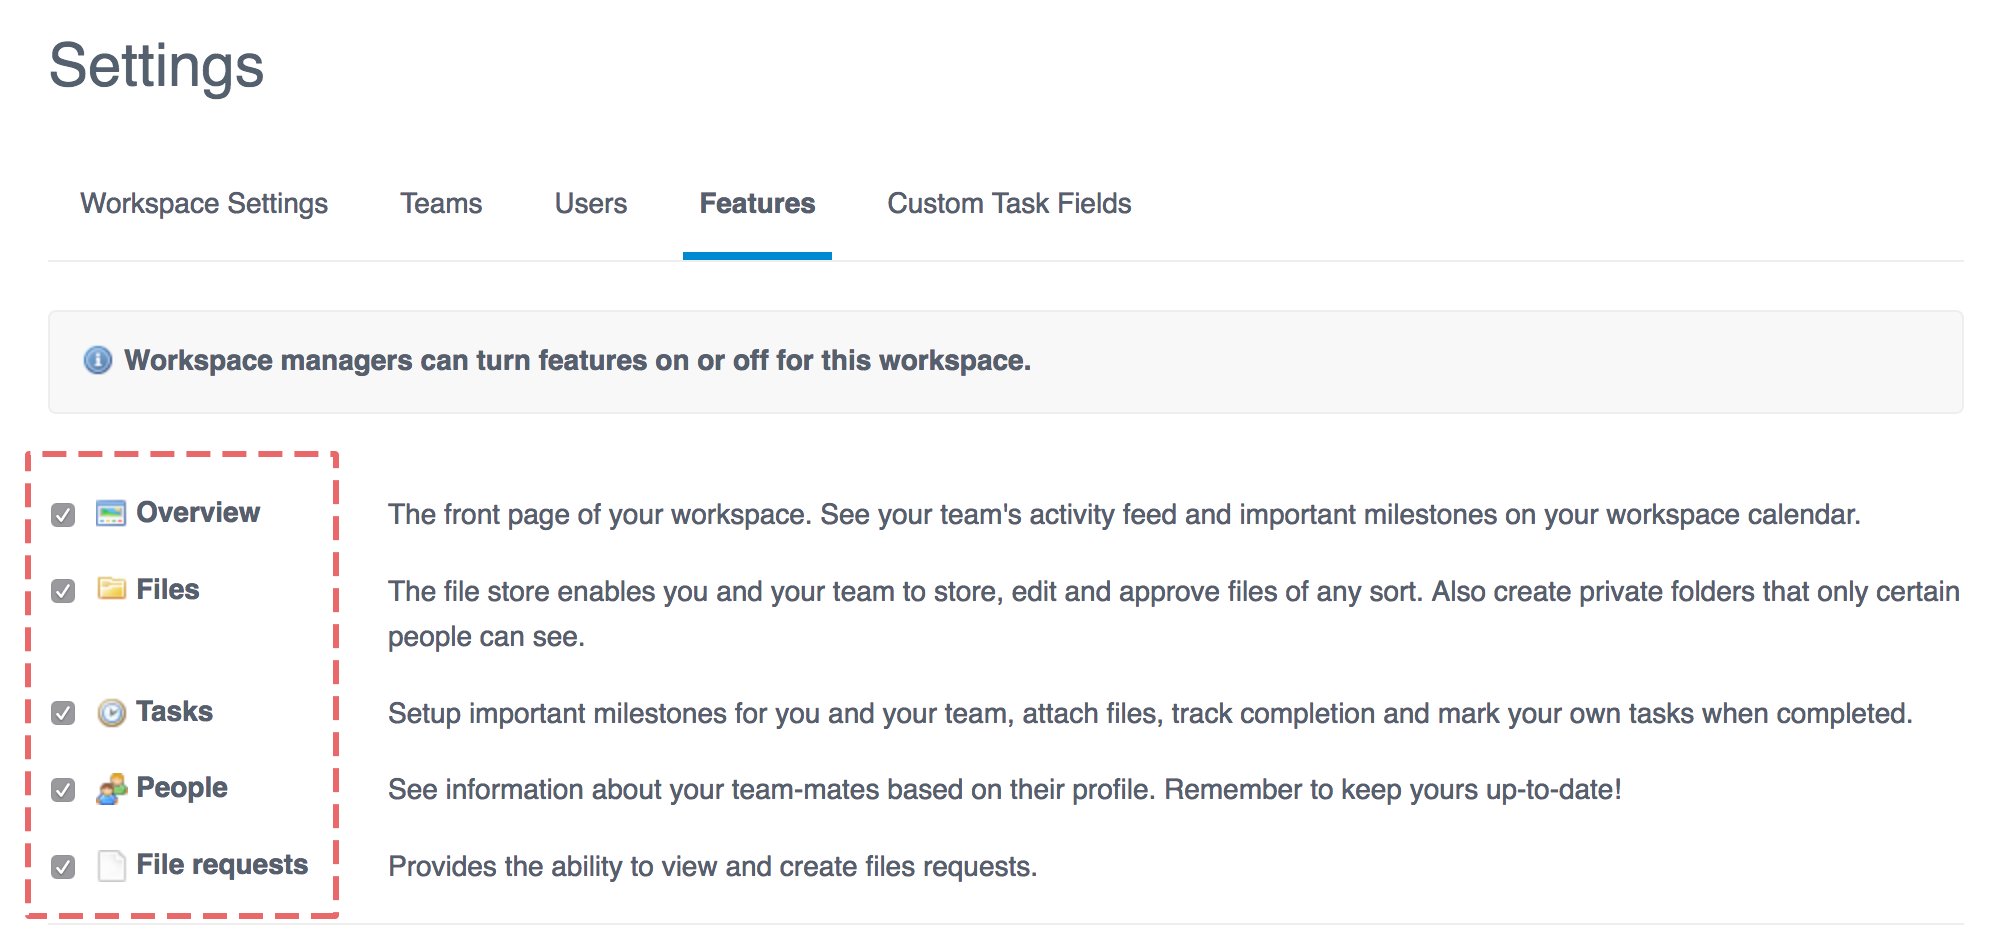
b) Set up features

Remove the tabs you will not use in the workspace from this area by unchecking boxes next to features.
For example, you may not want to use the Tasks tab if your project involves only internal staff.

III) Create Teams
a) Understanding Teams
1) Teams group members of a Workspace together so you can share information with multiple people in one click.
2) Teams help you better control folder access. You are able to control which Teams can edit, view, and download content.
b) Create your Teams
1) Go to the Teams area in the Settings tab.
2) Click New Team and Give the team a title and a description if desired.
3) Click Create. Repeat for the number of Teams required.

.
IV) Add Content
Go to the Files tab of your new Workspace to start adding content.

Create new folders straight from the menu in the blue panel on the right-hand side of your Huddle screen. These empty folders can have content added to them later by other users.
TIP: Remember that folders are ordered by default in alphabetical order so if you want your folders to be in a specific order it is advised to number them from 1 to 10 etc.
Add files to your folders by dragging and dropping documents onto your Huddle screen from your PC.
.
V) Set up folder access levels
It is important to set up folder access levels prior to inviting other users into your Workspace to ensure that new users only have access to what you want them to right from the point of invitation.
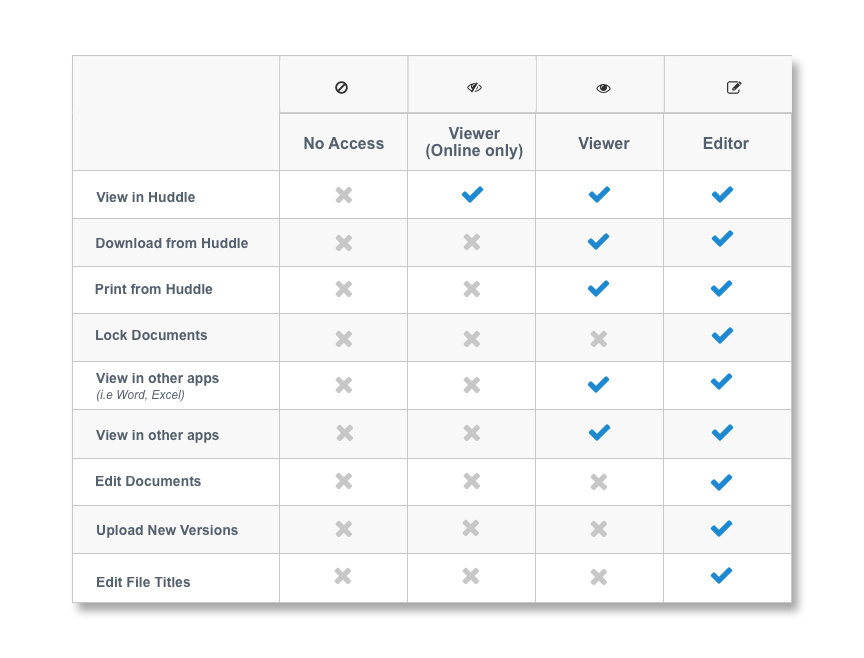
There are four levels of access inside Huddle:

No access, Viewer (online only), Viewer and Editor. This is what each level of access will give to your teams:

To change folder access for a team:
a) Go to the Files tab.
b) Select a folder you want to restrict access to.
c) Click Edit folder access in the blue panel on the right hand side of your Huddle screen.
d) Assign a level of access to the folder in question to each of the teams you set up.
e) Repeat for any other folders you want to restrict access to.
See Step 10 of this user guide for a detailed view of how to set folder access levels.
.
VI) Invite users
Lastly, invite other users to your Workspace. You may want to start with your internal users before inviting external parties and you can consider sending out a pre-invitation email to make sure that all invited are on the look out for the Huddle email that will come to them. You can find an example launch email here.
a) Invite a user by clicking the invite user button to the right of your Workspace name, in the panel on the left-hand side of your screen.

b) Enter an email address into the first box. You can copy and paste as well as type. If you are inviting multiple users to the same team you can add their email addresses here together.
c) Select the team(s) you would like to add these users to.
d) Add a private message in the last text box.
e) Click invite.


