
New article
Recently updated
How to upload folders using a zip file

In order to upload multiple folders they must be compressed into a single zip file which can then be uploaded and automatically extracted to the target folder.
For a step by step guide to uploading files to Huddle click here.
The high level process is as follows.
- In Huddle: select the option to upload folders
- On your computer: compress the desired files and folders into a single zip file. This process differs between PC and Mac - don't worry, we'll provide you with specific instructions on how to do this depending on the operating system you're using.
- In Huddle: upload the zip file that contains your files and folders.
- In Huddle: once uploaded, the entire contents of the zip file will be automatically extracted into the target folder. We will notify you when the process is complete and your files and folders are ready to use.
Tip: Uploading folders works best when you want to add new content, already within an existing folder structure, to Huddle. Once your documents are in Huddle, you can take advantage of version control and upload multiple new versions of documents at once if desired.
Step 1 - Select the "upload folder" option in Huddle
In Huddle navigate to the folder you want to upload to. Click on the "Upload files" button.

This will open the "Upload files" dialog. Then click on "upload a folder".

This will open the "Upload folders" dialog. Proceed to step 2.
Step 2 - Compress content into a single zip file on your computer
You now need to compress your files and folders to a single zip file. Follow the instructions below based on your operating system:
Once you have created your zip file, proceed to step 3.
Step 3 - Upload your zip file to Huddle
Switch back to Huddle (in your browser) and click on the "Select zip file" button.

This will launch a standard file browser dialog. Navigate to the zip file you created on your computer, click on it and then on "Open".
Your zip file will start uploading to Huddle.
Once the upload completes, we will start the extraction process automatically. At this point you can continue working by clicking on the "Close" button - we will notify you when your files and folders are ready.

Step 4 - Zip file extraction and notifications (automated)
Once we've completed the extraction process we will notify you of the outcome by email...
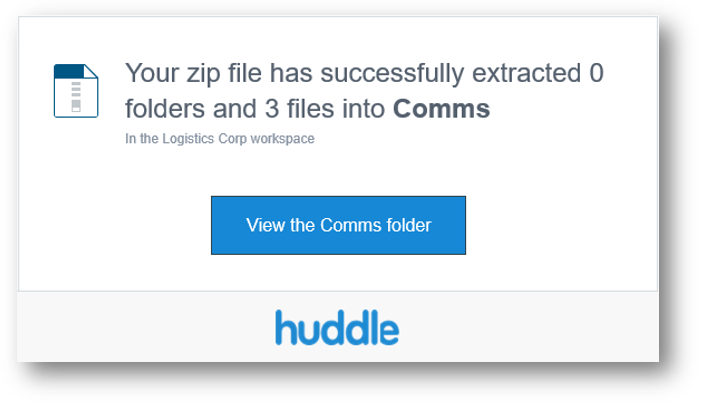
... and on your dashboard
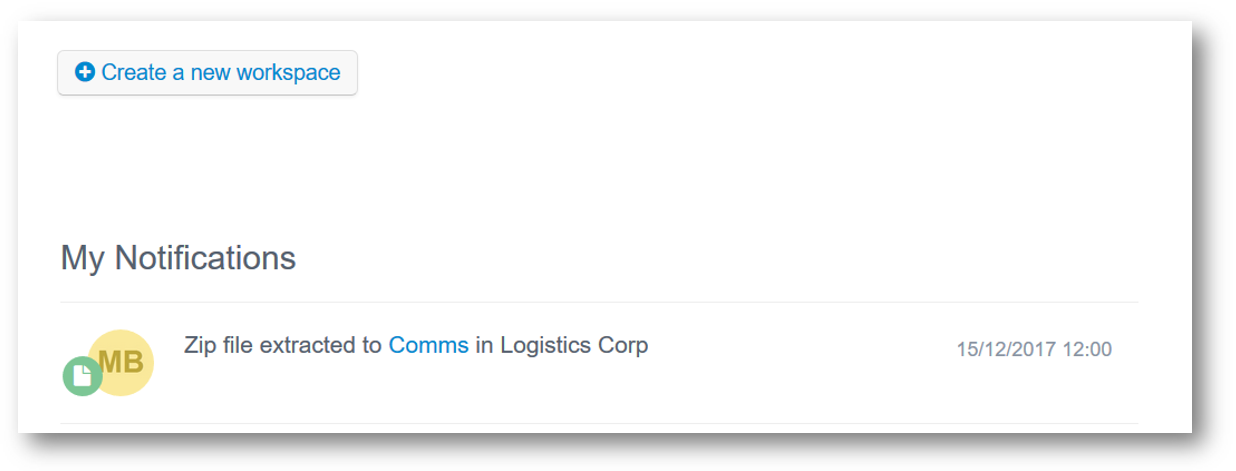
Both notifications provide links directly to the folder where the contents of your zip file has been extracted.
Notes
1. What compressed file formats are supported?
Only .zip files are supported. We chose zip files as it is the most common format that can be created on both Mac and Windows without installing additional software.
2. How much can I upload?
The compressed zip file cannot exceed 10GB and the extracted (uncompressed) content cannot exceed 15GB. Please note that large zip files may take a while to be processed.
3. What do I do if my folders can't be extracted?
If we fail to extract some or all of your zip file's contents it can be for a number of different reasons. In the confirmation email, we will inform you as best we can as to what might be wrong. These include:
- The zip file is password protected
- The zip file is corrupted
- A file within the zip file is corrupted
- Files or folders within the zip file are more than 20 folder levels deep and cannot be extracted.
4. Can I upload new versions of documents across multiple folders using a zip file?
Not currently. Instead, we recommend you upload multiple new versions of documents on a per folder basis.