What is a Workspace?
In Huddle a workspace is a secure private online space. Workspaces function on an invite only basis so you will only ever see a workspace if you have created it or if you have been asked to join it. The data you upload into it is completely private and can only be accessed by your invitees.
They are the areas where you can collaborate on files, share information and discuss ideas with "Huddle Note", assign tasks and use all of Huddle's tools with your clients and colleagues whether they are internal or external to your organisation.
A workspace might be created for a project, a campaign, a team or a private client engagement area. Every workspace is different and you can tailor them to suit a wide variety of needs.
Create your first workspace
1. Click the + button as in the image below (Figure A).
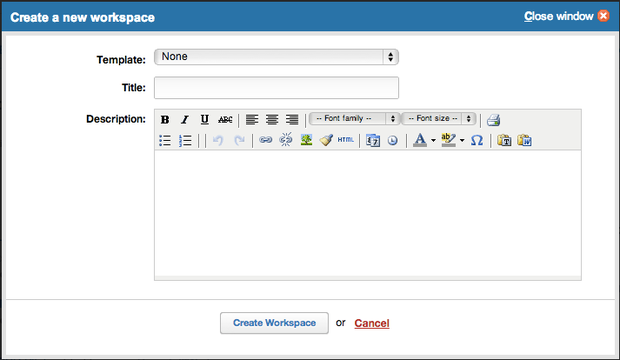
The ‘Create a New Workspace’ dialog box will appear. (figure B below)

Create A New workspace
2. Select a template from the Template drop-down list (Figure B) if you want to base your workspace's layout and design on another workspace residing in your organisation's Huddle. I selected None from the Template drop-down list, so I can point out the full options that are available when creating a workspace.
3. Enter a title for the workspace in the Title field (Figure B).
4. Add a description of the Huddle workspace for your users in the Description field (Figure B), if you like.
5. Click the Create Workspace button (Figure A). Huddle creates a new workspace similar to Figure C.
Invite people to the workspace
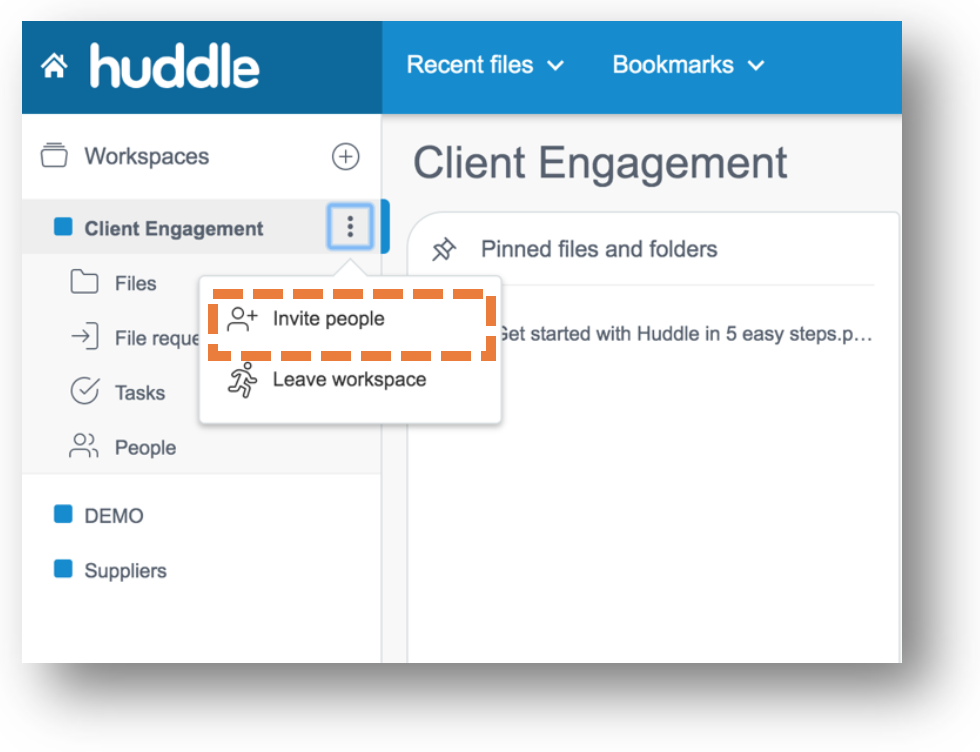
1. Click the Invite people button (Figure D).

2. Click Invite People. The Create A New Invitation screen will appear (Figure E).
Figure E

3. Enter an email address for the users you want to invite to your workspace in the 'Type a name or an email address' field.
4. Edit the Personal Message (Figure E), if you want.
5. Click the 'Send invitation' button (Figure E) to send the invite.


